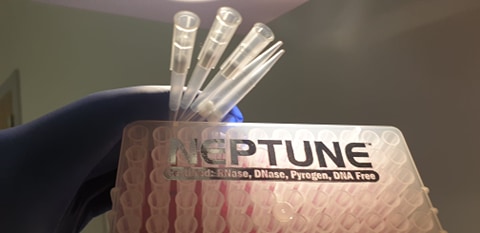
ELISA is an immunoassay widely used both in basic research and for diagnostic purposes. Its applications range from the detection of contaminants in food or industrial processes to the detection and validation of biomarkers, analyte quantification or antibody titration.
In this post we bring you some tricks for a successful ELISA test that will help you achieve accurate, consistent and reproducible results.
1.- SELECT THE FORMAT THAT BEST SUITS YOUR OBJECTIVES
The flexibility of the ELISA immunoassays in terms of their design, allows choosing among the different types of assays the one that best suits the objectives pursued in each experiment:
- ELISA direct
It is the fastest and simplest format, where the plate is covered with the antigen and subsequently incubated with a conjugated antibody. It is used for example to titrate secondary antibodies.
- Indirect ELISA
This method is the most commonly used, and is frequently used to titrate primary antibodies. The plate is covered with the antigen as in the direct ELISA, but with the difference that two antibodies are used for detection, one primary and the other secondary, which allows the signal to be amplified.
- ELISA sandwich
This is an assay that offers greater sensitivity than the previous ones, and which requires a pair of specific antibodies (one capture and the other detection) against the antigen.
- Competitive ELISA
The competitive ELISA allows determining the specificity of a certain antibody against its antigen. It is also used to quantify antigens or to evaluate cross reactivity.
2.- PREPARE THE SAMPLES CORRECTLY
The characteristics of the samples to be analyzed directly influence the test conditions, including:
- The complexity of the sample:
- Homogeneous samples (purified antigen)
- Heterogeneous samples (unpurified mixture)
- The expected amount of antigen present
In this entry on Sample preparation for ELISA you will find more details on the correct preparation of the samples.

3.- SELECT THE APPROPRIATE ANTIBODIES
In the event that you are going to assemble your own ELISA, the selection of the antibodies is a critical step for a successful result.
Both monoclonal and polyclonal antibodies, or even a combination of both, can be used in ELISA immunoassays. It is essential to know in detail the advantages and weaknesses of each of them when designing our experiment.
As we have already commented on other occasions, monoclonal antibodies are more specific since they recognize a single epitope of an antigen, which gives them the advantage of producing less background noise and less probability of giving rise to cross-reactions and nonspecific binding.
However, polyclonal antibodies recognize several epitopes of the same antigen, which makes them much more sensitive than monoclonal antibodies to the detriment of their specificity.
In this entry on Differences between monoclonal and polyclonal antibodies you will find a more exhaustive analysis of the advantages and disadvantages of using each of them.
4.- CHOOSE THE RIGHT ELISA FOR YOUR EXPERIMENT
In the event that you opt for a commercial ELISA kit, it is necessary to assess some factors such as the type of sample to be used, the species from which the analyte of interest is derived, or the detection range, among others.
In this post we leave you some tips on what characteristics to look for in an ELISA kit. You can also try our ELISA Kit Finder , and of course, do not hesitate to contact us if you need advice on this matter.
5.- AVOID CROSS CONTAMINATION
Like any other analytical method, ELISA immunoassays are susceptible to contamination if the reagents and / or instrumentation are not handled properly.
Cross contamination can occur in four directions:
- From sample to sample
In the event that different samples are handled in the same test, the remains of one could be transmitted to another by dragging, giving rise to false positive results. This type of contamination is avoided by changing the pipet tips after each sample.
- From pipette to sample
Although the tips or the pipette itself are contaminated, they can contaminate the samples into which they are introduced. To avoid this, the tip should be changed after each sample, use only new or properly sterilized tips, or autoclave the parts of the pipette that come into contact with the sample.
- From the sample to the pipette
To avoid this, the pipette must be kept vertical both during pipetting and during storage, in addition to slowly releasing the plunger when depositing the sample.
- From well to well
To avoid this, special attention should be paid to the washing steps, making sure, among other things, not to overfill the wells with the washing buffer.
6.- BUILD A RELIABLE STANDARD CURVE
One of the tricks for a successful ELISA assay lies in the importance of constructing a standard curve for each assay or plate that is analyzed, since factors such as the variation between operators, the incubation conditions or the pipettes used in each case, can make that the same curve made at two different times does not reflect exactly the same OD values.
Here we tell you how to make a standard curve for ELISA .
7.- OPTIMIZE THE RESULTS
Once the test has been performed, the results may reflect unexpected values: excessively high or low signal, absence of signal, excessive background noise or low reproducibility, among others.
It is important to optimize each test to obtain the appropriate results, and for this we leave you these 6 Tips to solve problems in an ELISA immunoassay .
